|
<< Click to Display Table of Contents >> Custom Data |
  
|
|
<< Click to Display Table of Contents >> Custom Data |
  
|
You can now add your own custom fields into the Donor Profile to manage additional data about your Donors.
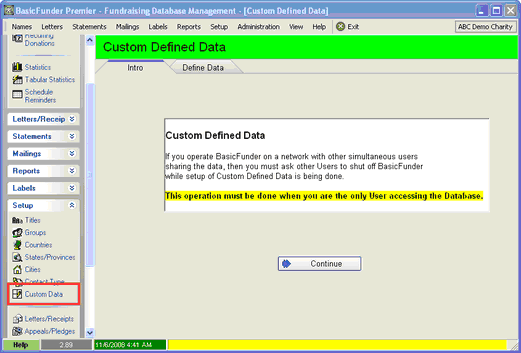
How to ...
There are two steps to adding Custom Defined Data
1.Add Data Groups
2.Add Fields into Data Groups
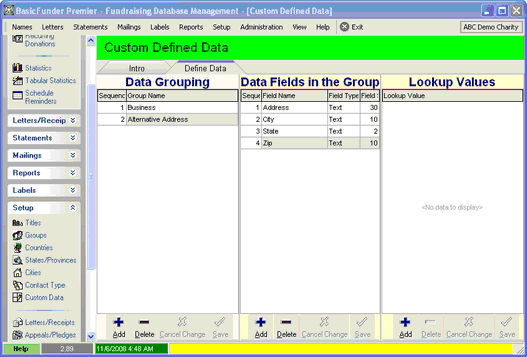
Data Group
1.Click Add at the bottom of the Data Grouping column.
2.Enter Sequence and Group Name
3.Click Save at the bottom of the Data Grouping column
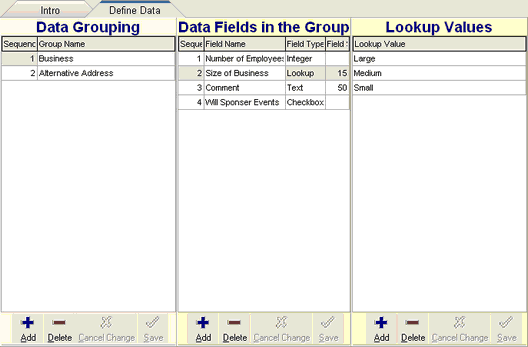
The Group Name is used to organize the extra data fields you want to manage. You will attach related fields to their respective Data Groups. In the example below you can see as we highlight the Business data group, we can see 4 fields associated to Business - Number of Employees, Size of Business, Comment, and Will Sponsor Events.
Data Fields
1.Select the Group you want to the field to be a part of.
2.Click Add at bottom of Data Fields column
3.Enter Sequence, Field Name, Field Type and Field Size (see below)
4.Click Save at the bottom of the Data fields column.
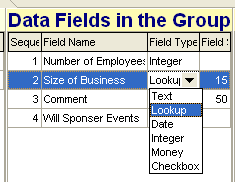
Fields Type
Text - Entry of characters and numbers
Lookup - Entry of characters and number, but from a pre defined list of choices
Date - Entry of date
Integer - Entry of numbers (no decimals)
Money - Entry of an Amount
Checkbox - Entry or Yes/No - True/False done by checking a box.
Field Size - ONLY applies to:
Text - maximum 240 characters
Lookup - maximum 30 characters
Lookup Values
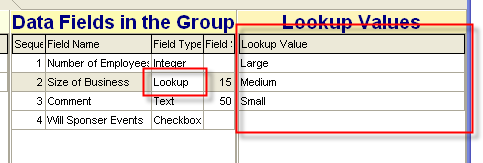
You need to provide the list of choices for Fields with a Field Type of Lookup. In the example below the field Size of Business will have a drop down list of three values: Small, Medium, Large.
1.Click Add at bottom of Lookup Values column.
2.Enter the value.
3.Click Save at the bottom of the Lookup Values column.
Donor Profile
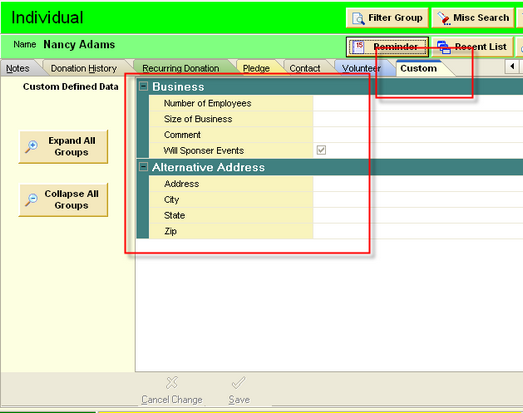
There is a a new tab in donor Profile - Custom where you can now enter the data for the Custom Defined Data you have created.
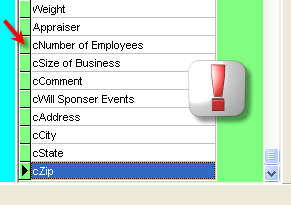
Any Custom Defined Data fields can be used in User Created Reports. The Fields will appear in the User Created Reports prefixed by a lower case 'c', indicating Custom Field.
